
Office Project- Before & After
Posted: December 19, 2018 Filed under: Design Inspiration, My Design Leave a commentI designed this office space almost 5 years ago and since then I have done quite a few offices. Seriously, I’ve done more offices now than I ever would have imagined.
I really love creating fresh, modern work spaces for people. Who says your office has to be blah with fluorescent lighting? Not me.
Here are some before & afters of the office I wrapped up this past weekend.
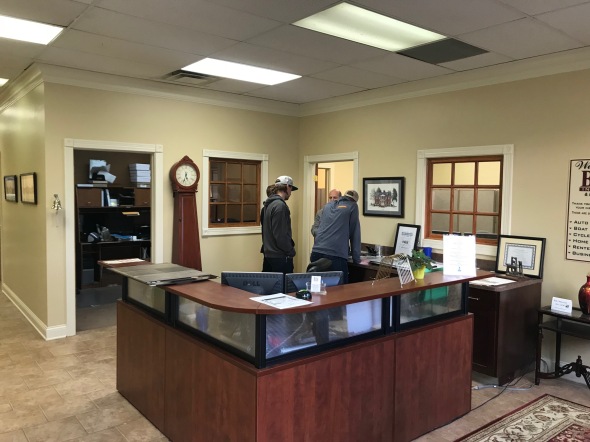
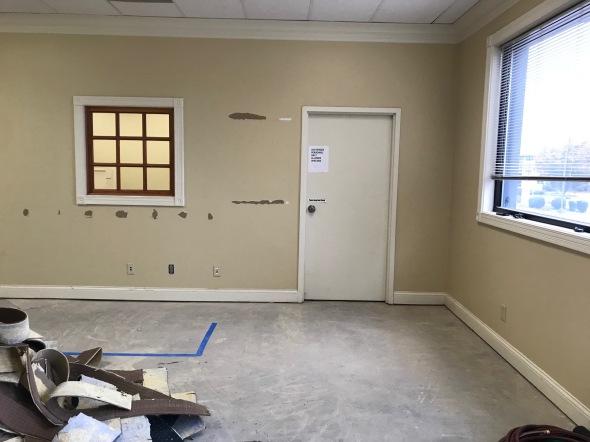
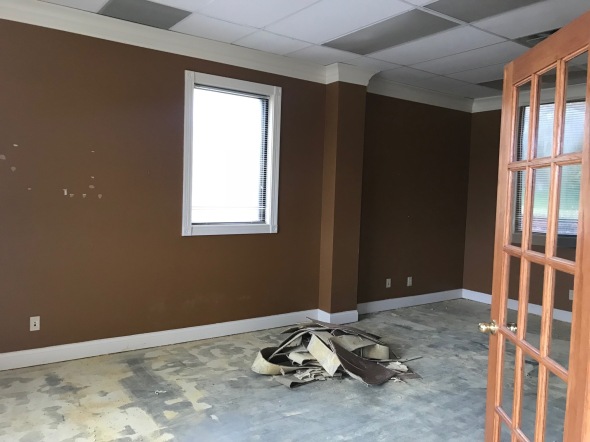
Lobby area BEFORE:
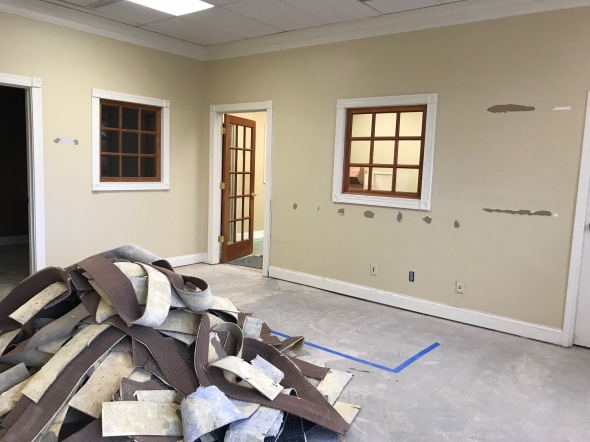
Progress of old flooring ripped up and getting ready for fresh concrete to be stained. I also decided to patch up those two interior windows because they just make the space feel dated.
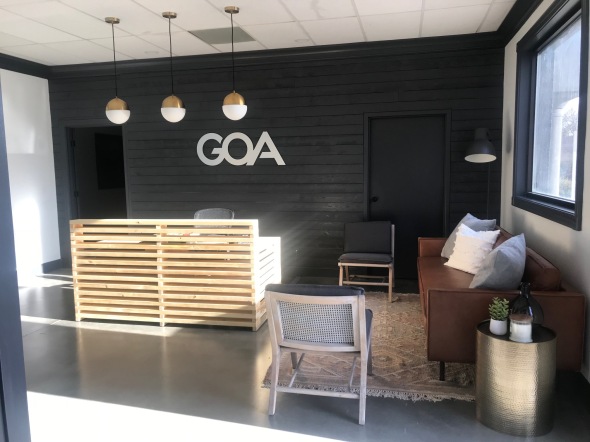
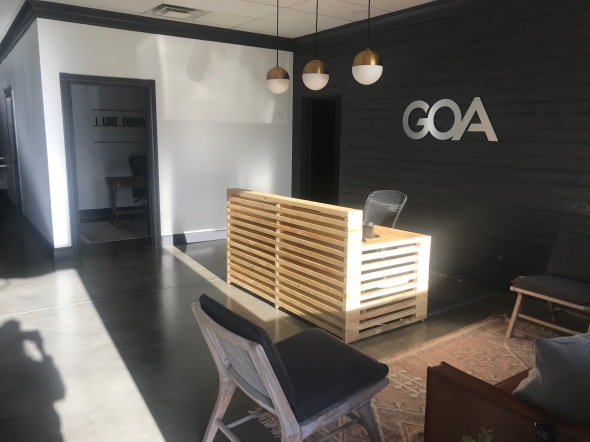
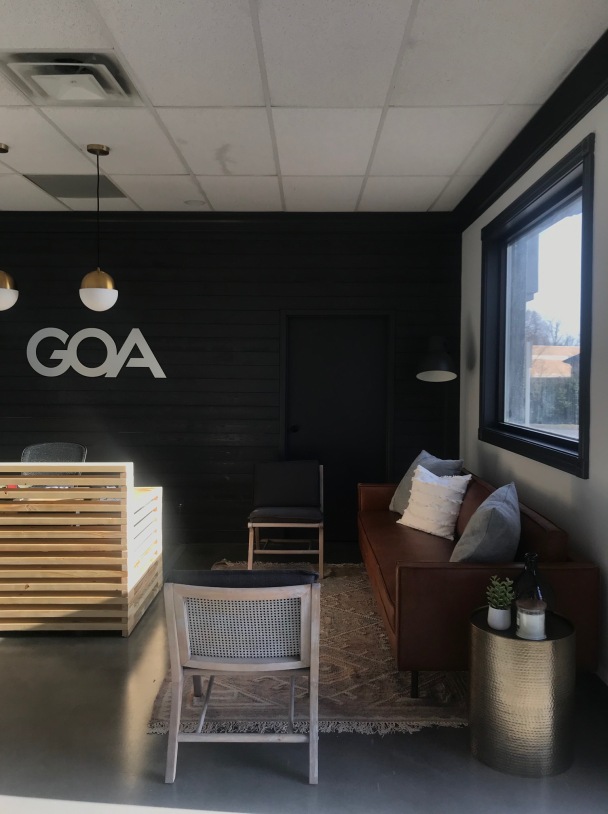
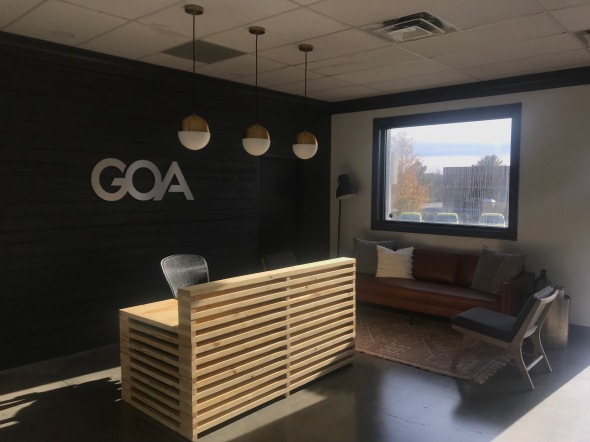
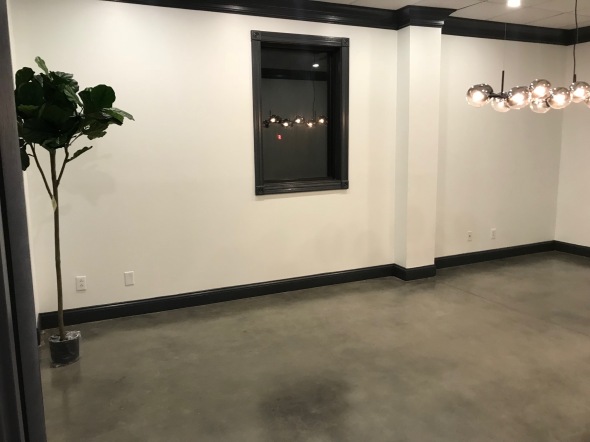
AFTER:
After closing off the window on the back wall it became a great spot for a feature. Shiplap painted dark gray for the win! Doing a smaller scale desk and hanging pendant lighting over it gives it a clean, fresh, more spacious feel.
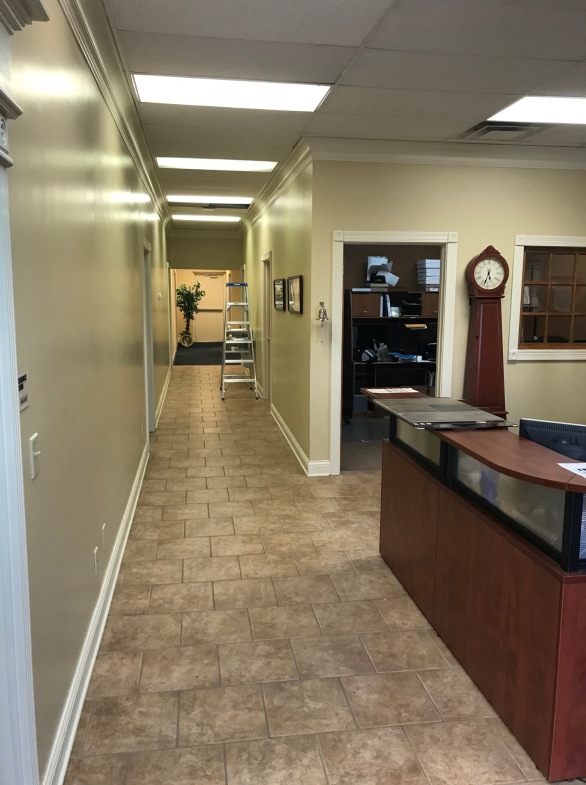
BEFORE:
The hallway was filled with fluorescent lighting and a blah paint color.
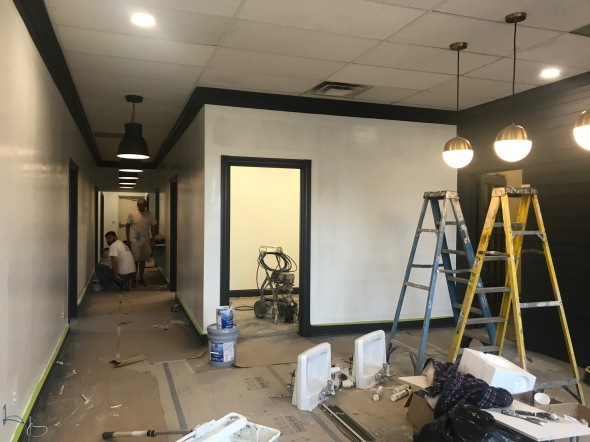
PROGRESS:
We removed the fluorescent lighting, added my favorite industrial pendants from Ikea, painted the walls a crisp white and the trim a dark gray. I don’t have the full after photo for the hallway yet because I am getting some prints framed to hang, but I will add it in later.
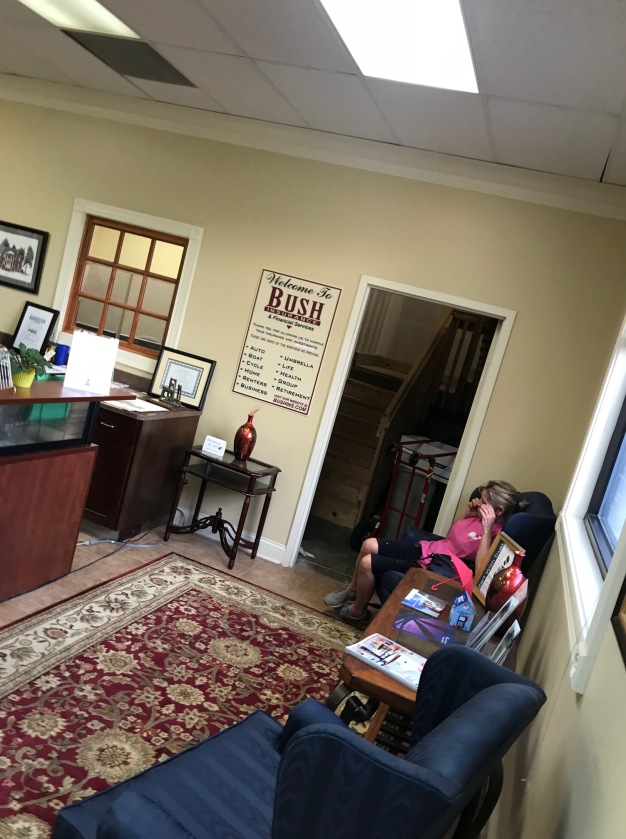
Sitting area in the lobby BEFORE!
PROGRESS
ATER:
Simple, functional and not crammed feeling at all. The saddle leather couch really steals the show for me 🙂
Here’s the angle looking back from the hallway:
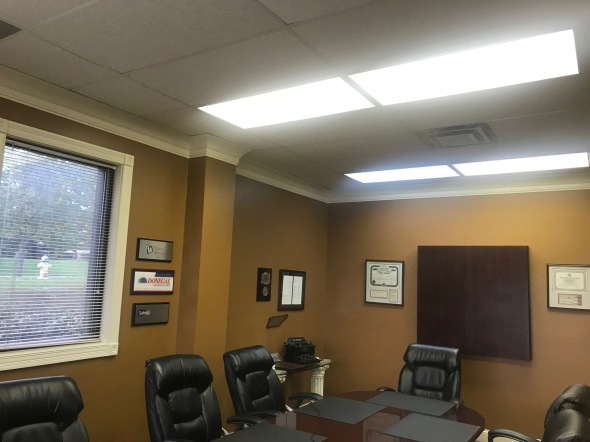
Conference Room BEFORE:
Nothing says let’s have a meeting like fluorescent lighting and an interesting shade of brown walls. Haha!
PROGRESS
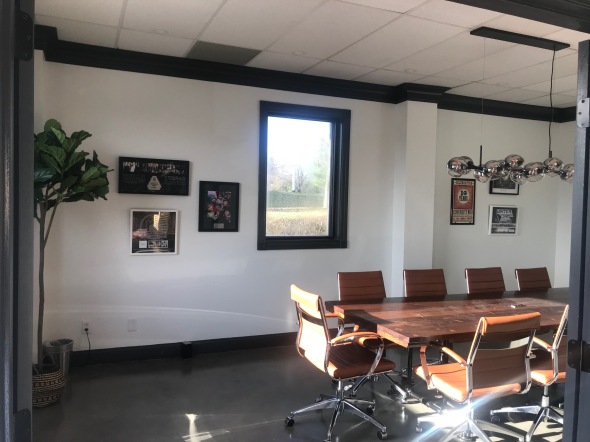
AFTER:
Fresh paint, lighting and stained concrete flooring gave this conference room an entirely new feel!
I wouldn’t mind meeting in here now 🙂
Not pictured were 7 individual offices, 2 bathrooms and a space with more cubicle style work areas. I don’t have photos of everything to share, but I thought I would share the highlights!
Another fun office project in the books. Working on another one as I type this. Cant wait to share!
xoxo,
O
Master Bathroom Remodel
Posted: November 6, 2016 Filed under: Design Inspiration, My Design | Tags: bathroom remodel, before and after, design, Home, home renovation, Interior design, interiors, master bathroom, modern, renovation, transformation Leave a commentLast February, I had the first meeting with my client for a master bath remodel. It was your basic late 90’s/early 2000’s bathroom. Jacuzzi tub, cubed window, whitewashed cabinets… My client had a great budget and was on board with a full gut of the bathroom. Just what you want to hear as a designer 🙂
After walking through the bathroom and talking with my client about their wish list, the designing began.
Client wishlist: free standing tub, steam shower, his & hers vanities and plenty of storage.
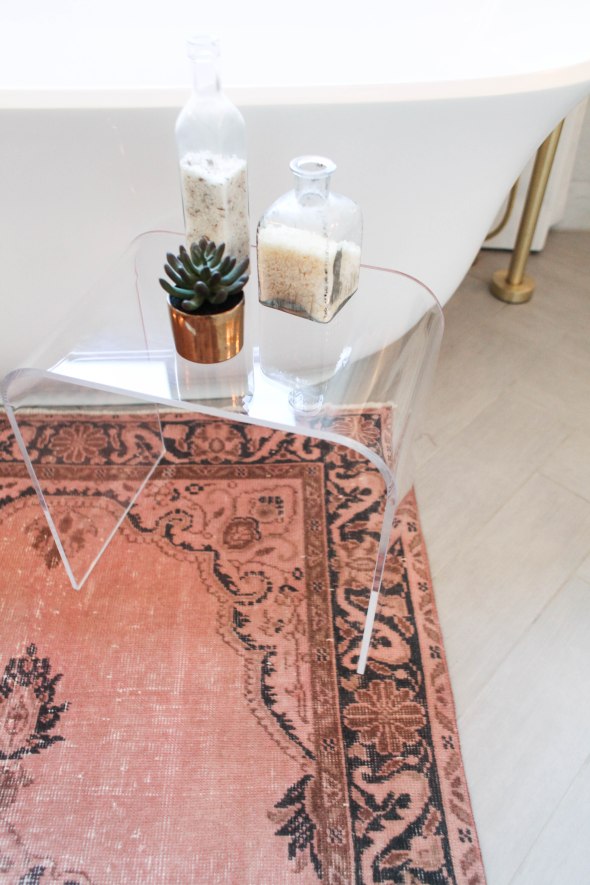
My design wishlist: marble, brass, modern/boho vibe, luxurious, relaxing/spa like
When designing a bathroom, I like to start with the tile first. I found this 8 inch marble hex that I LOVED and knew it was going to be the showpiece of the space. I wanted the hex to cover every wall and I chose a 12×24 ceramic gray tile laid in a herringbone for the floor.
After nailing down all of the tile, next up was the plumbing fixtures and finishes. I went with brass and modern fixtures. After tile & plumbing fixtures, next up was the layout. Since this was a complete gut, I was basically working with a shell so I could pretty much do whatever I wanted with the layout.
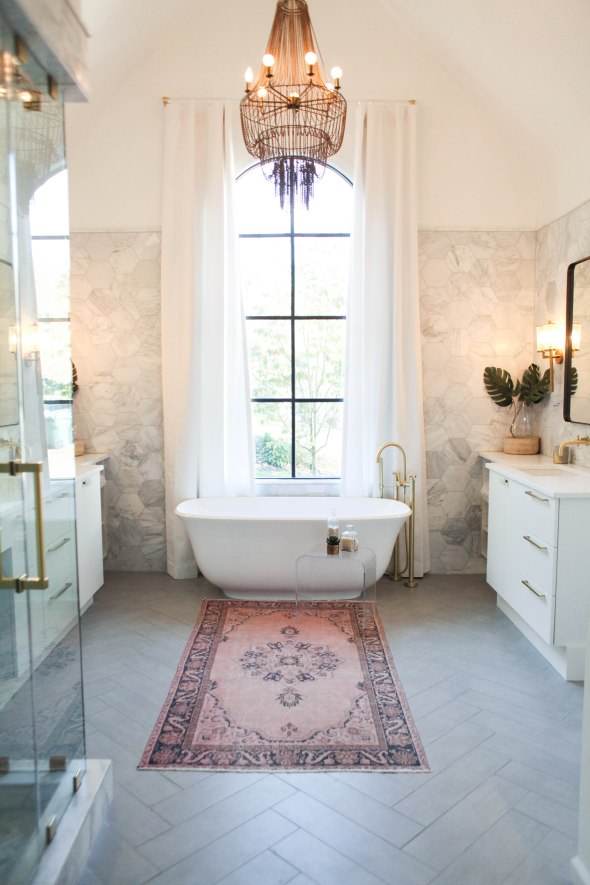
Here are a couple of inspiration photos:

Now for some photos of the bathroom…
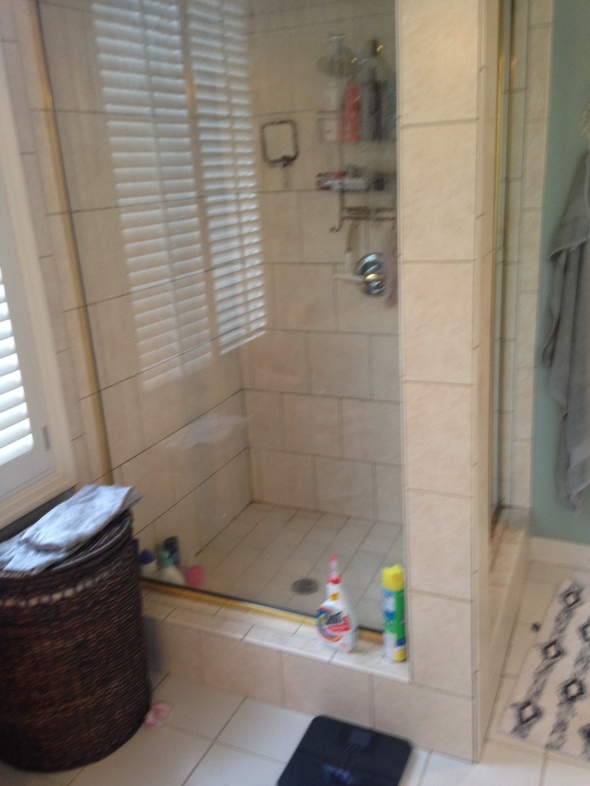
Before:
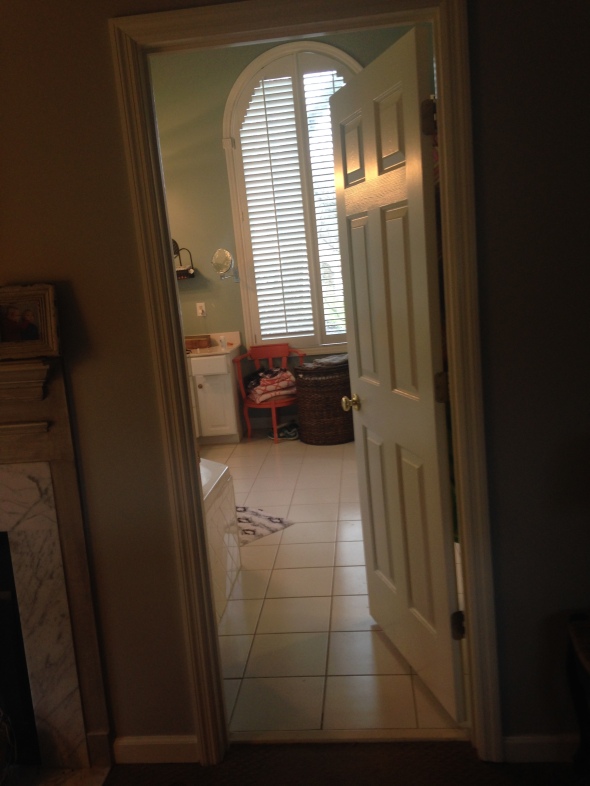
To the right of the window was the old steam shower:
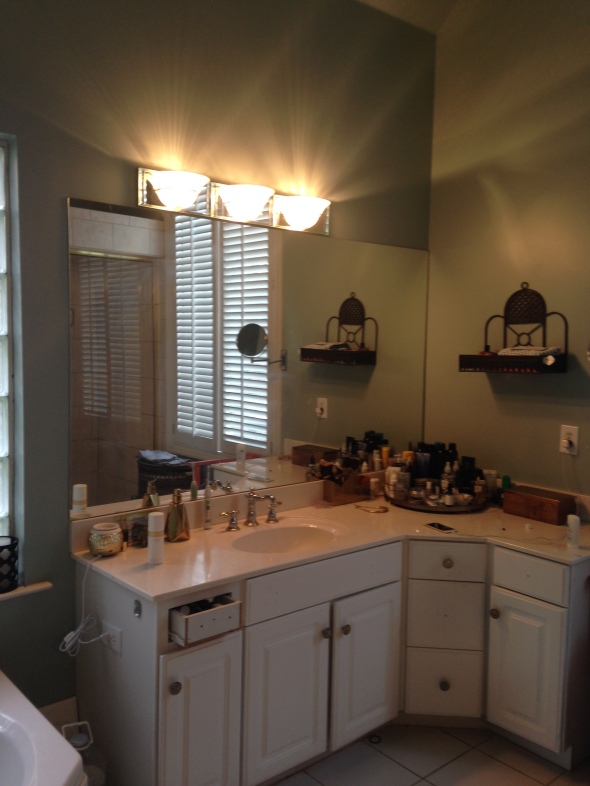
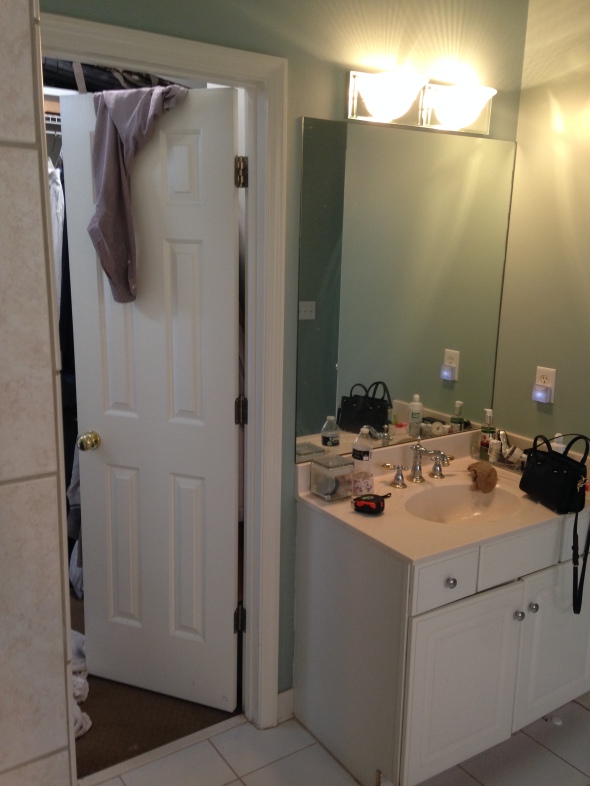
To the left of the window was her vanity:
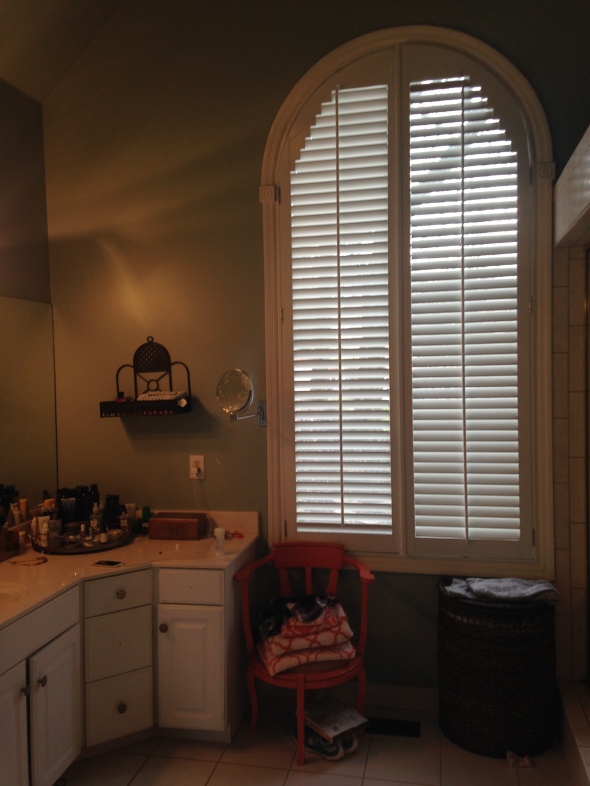
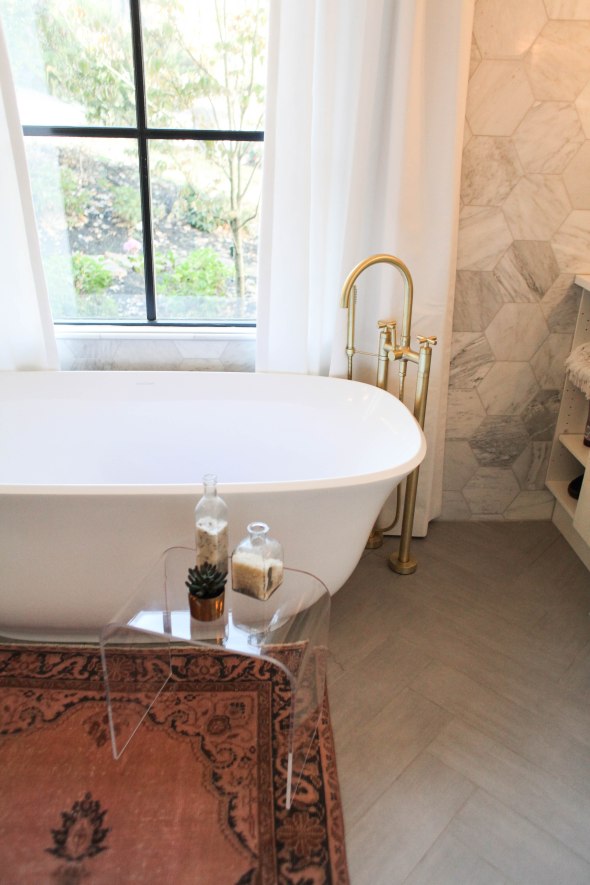
The window got quite the facelift. We removed the plantation shutters and added/painted the trim work black to resemble the look of a steel window.
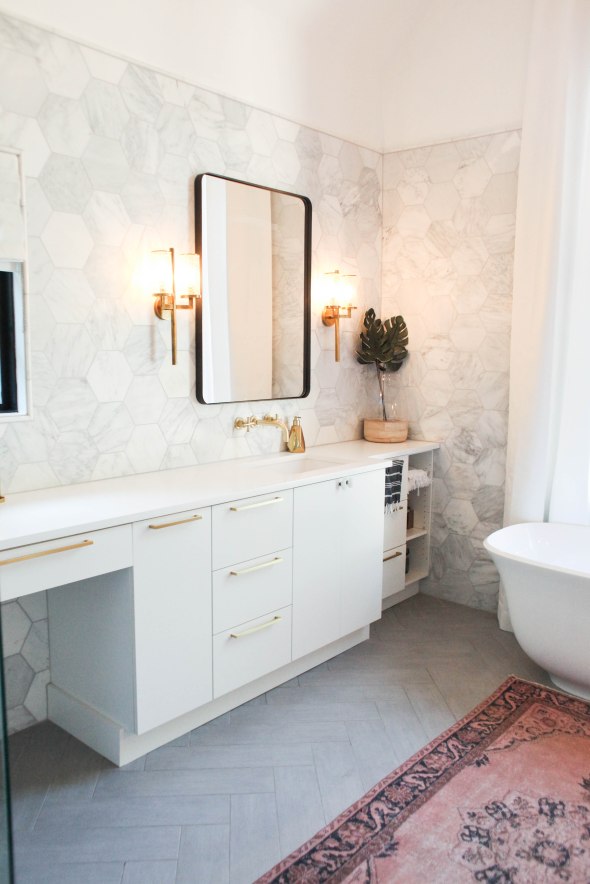
Here’s the after:
Her vanity area before:
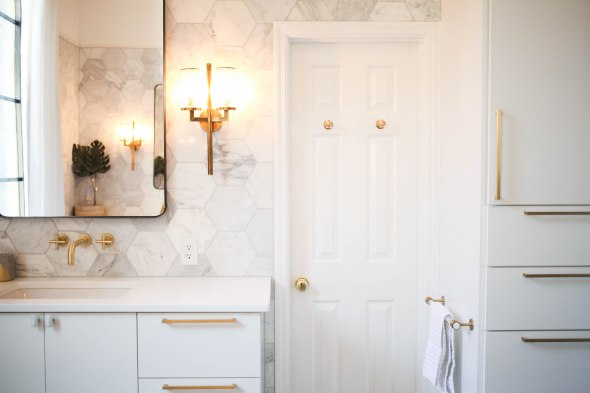
After:
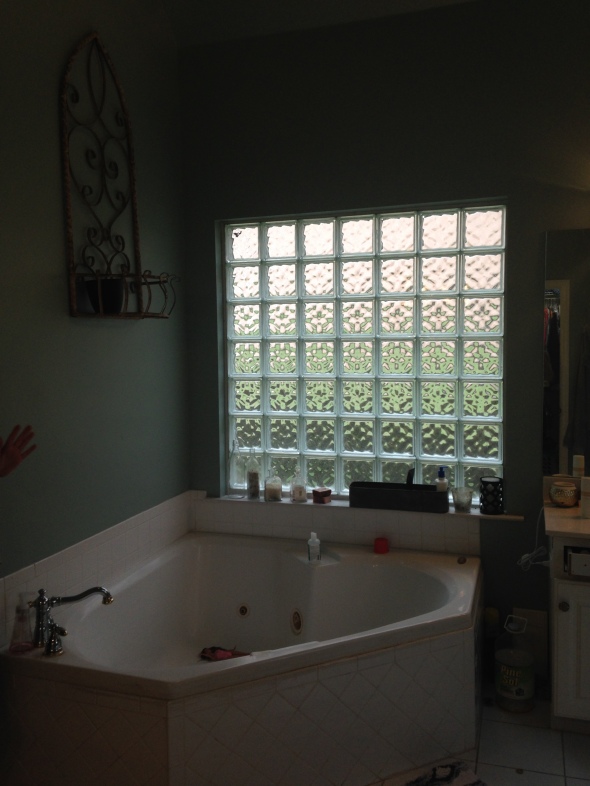
The cubed window was above the jacuzzi tub which all got ripped out and is now where the new steam shower is.
Before:
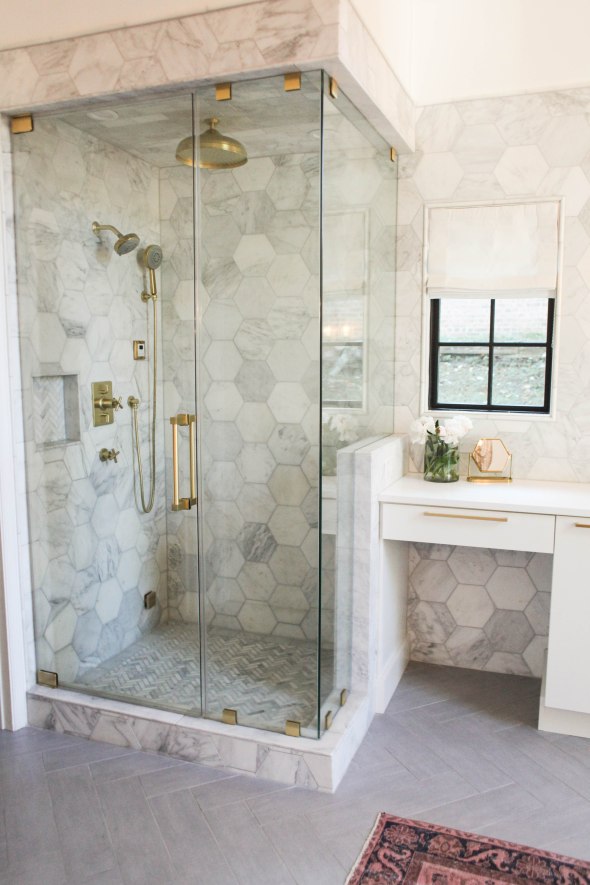
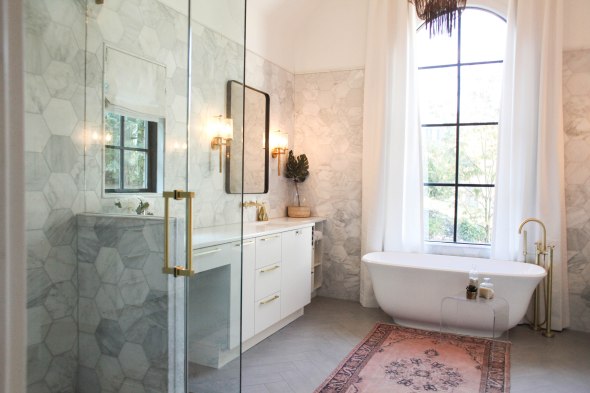
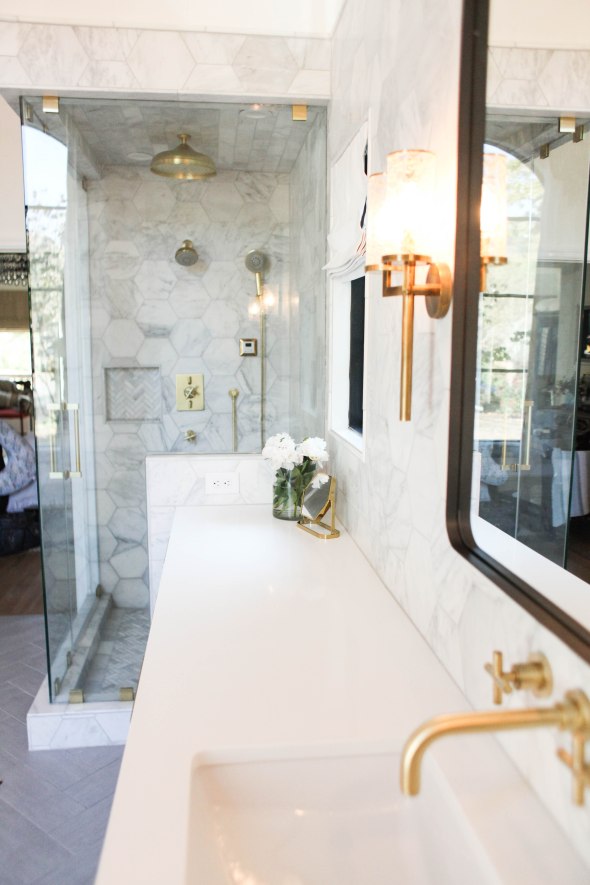
After:
We closed off the cubed window for the shower and added a small window beside it for more natural light!
His vanity used to be here, with the steam shower to the left of that closet door:
This is how it looks now:
We did a built in for plenty of storage where his vanity used to be and moved his vanity where the steam shower used to be!
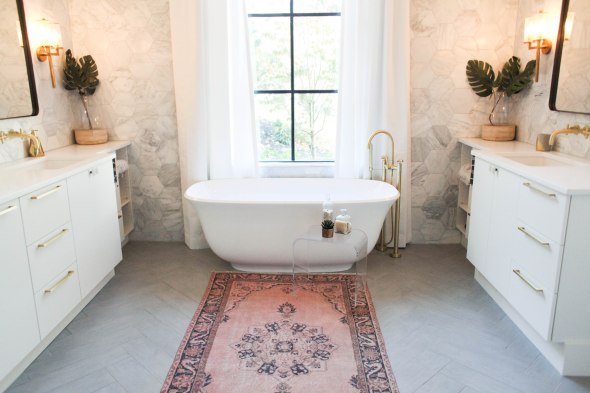
Center view:
Her side:
His side:

Now for some detail shots of the shower:
This shower has everything…steam control , aromatherapy, rain head, hand held spray.
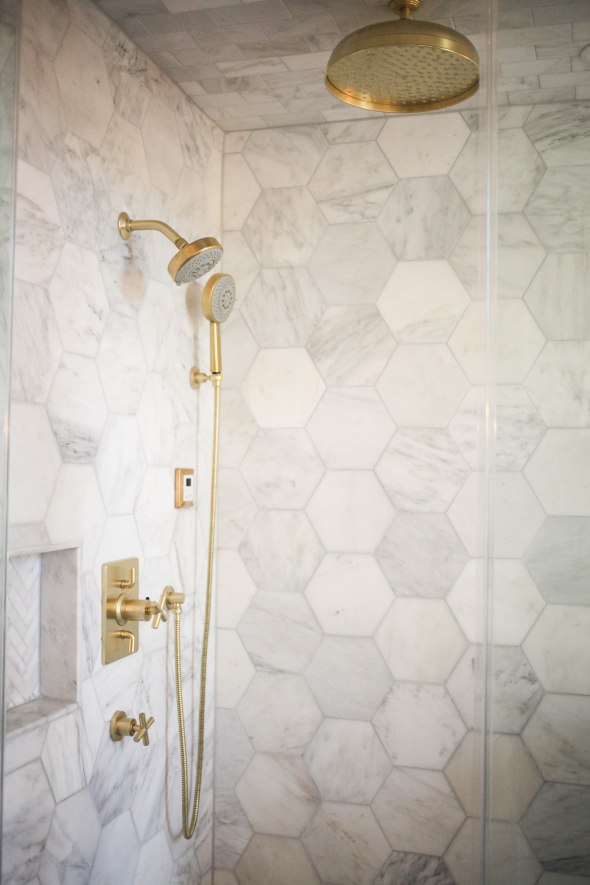
Marble and brass…all the heart eyes!!

Side view:
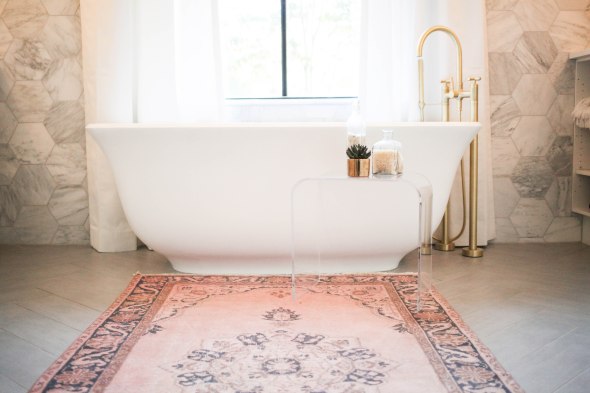
Now for some detail shots of the tub:
I will leave you with one more before and after!
Before:
After:

This was such a fun project for me and I can’t wait for my next remodel!
Thanks for stopping by!
xoxo,
O
Office Design
Posted: July 1, 2016 Filed under: Design Inspiration, My Design | Tags: before and after, design reno, Interior design, office design ideas, office transformation, Subway Tile, wood beams Leave a commentTwo years ago, I was able to design my first office.
If you didn’t see my post on that office, you can see it here.
Well, two years later in the same building, another company hired me to design their office and whew, did I have my work cut out for me.
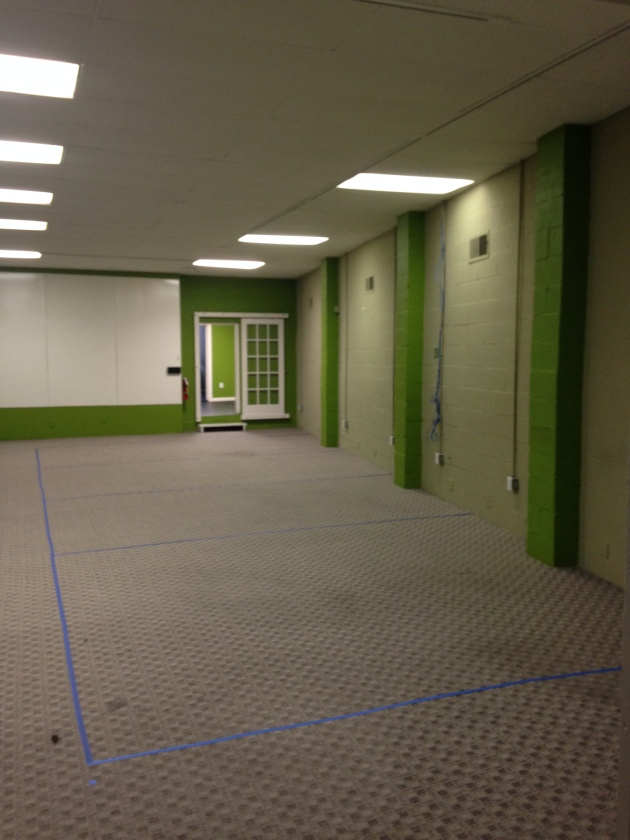
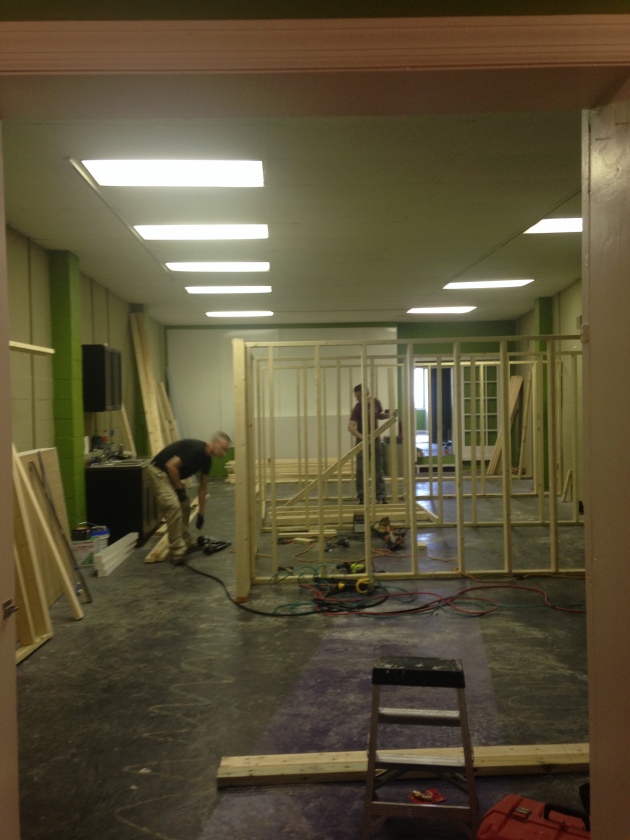
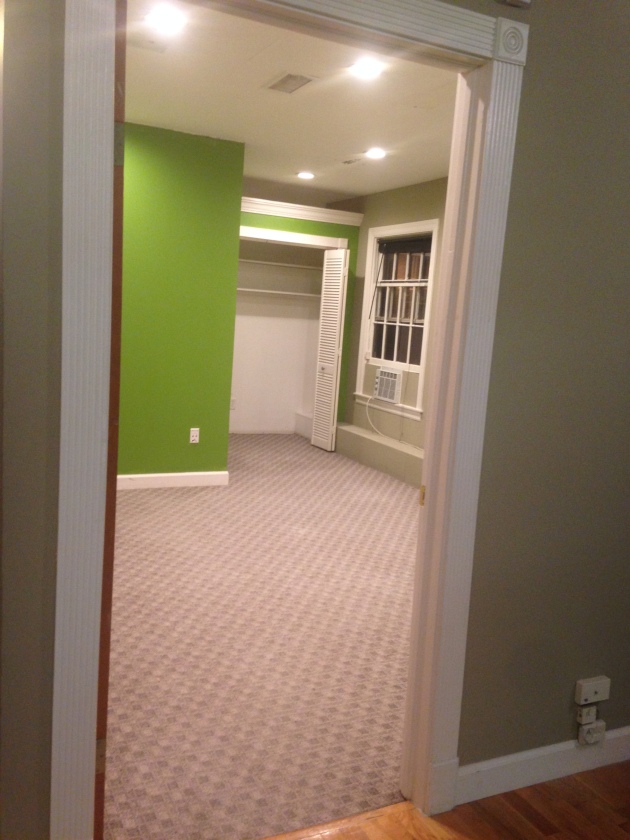
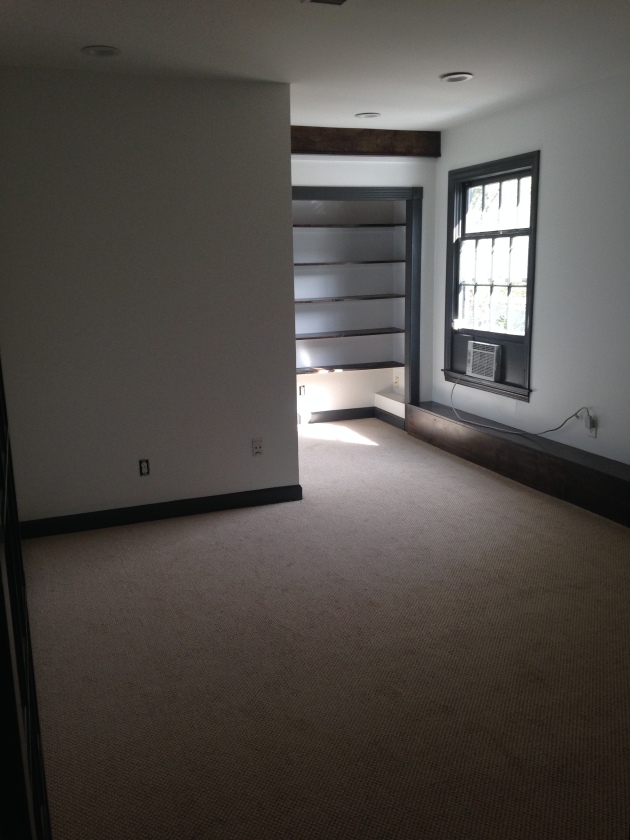
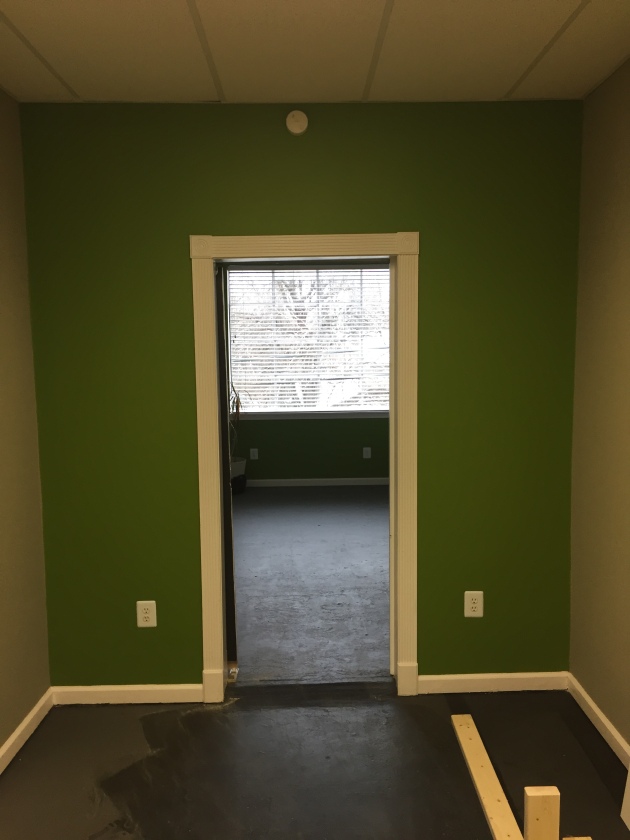
I had the first walkthrough at the beginning of February. Here is what I walked into. Fluorescent lighting, lime green, tan…eek!
They needed individual offices in this big open room so the painters tape on the carpet is where we were planning to build individual offices.
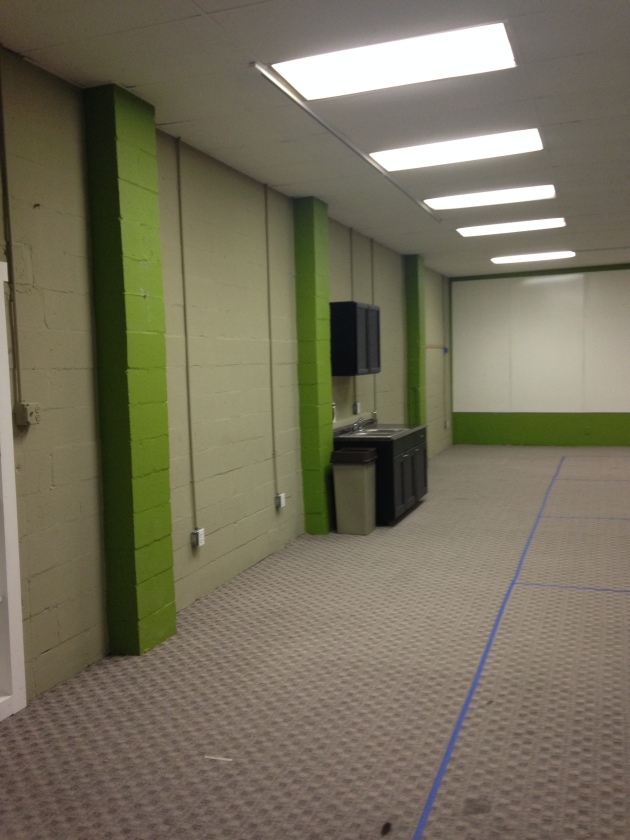
Other side of the room
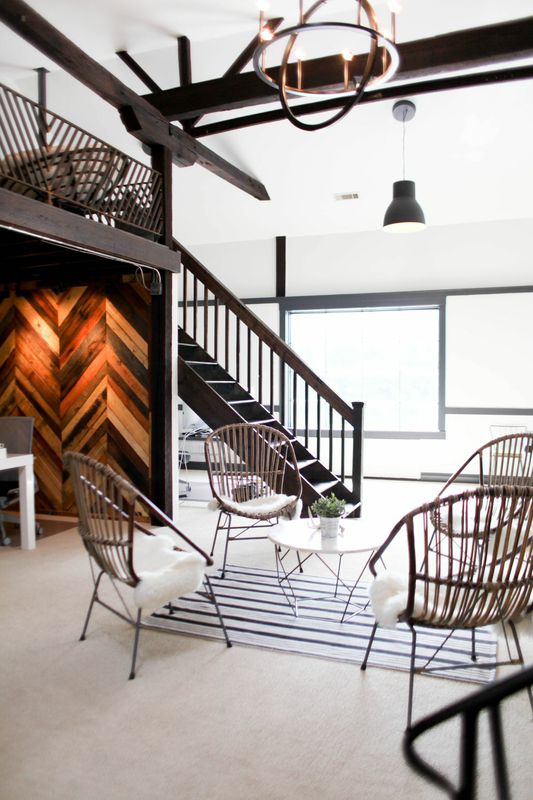
My first thought was that the space felt stark and uninviting so my goal was to add character and warmth. I pulled inspiration from my other office..high contrast, clean, industrial and wood elements. The tough thing about this space as opposed to the other office was that this office has zero natural light where as the other office had tons of natural light. Trying to make this space feel inviting was quite the task.
First things first, remove carpet.

My initial vision was to sand, stain and seal the concrete for a clean, industrial look. Similar to this: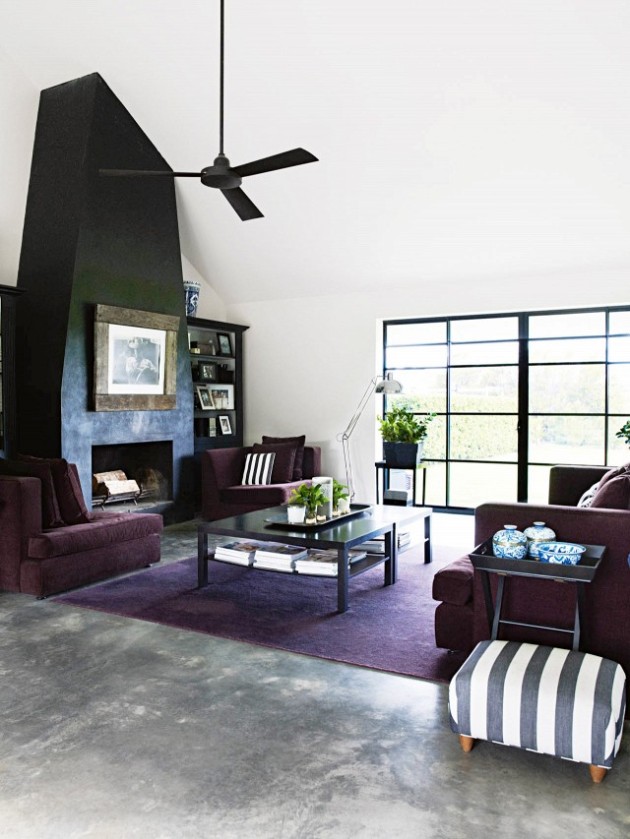
Unfortunately, once the carpet was removed we found that the concrete was not in great condition. Uneven, crumbling in certain places and not able to be sanded down. On top of those issues, the building is old with no elevator so the concrete guys had no way of getting their 1000 pound equipment in the room. Had to change plans so I decided to go with painted concrete.
Moving forward from there was office build out.
Framing.
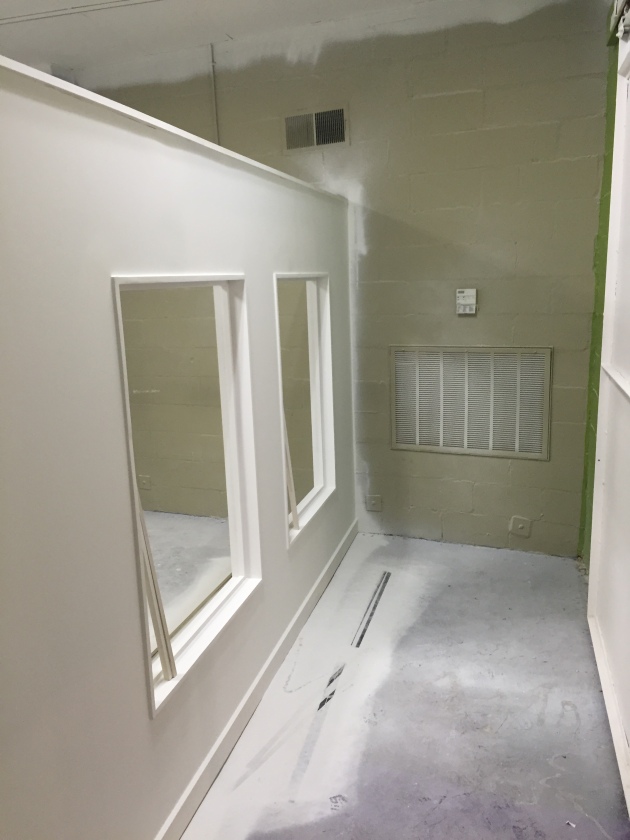
Sheetrock done.
I decided to add windows on the ends of the build out to make it feel more open for the people working in the offices. If they can’t have natural light they can at least have a window. 🙂
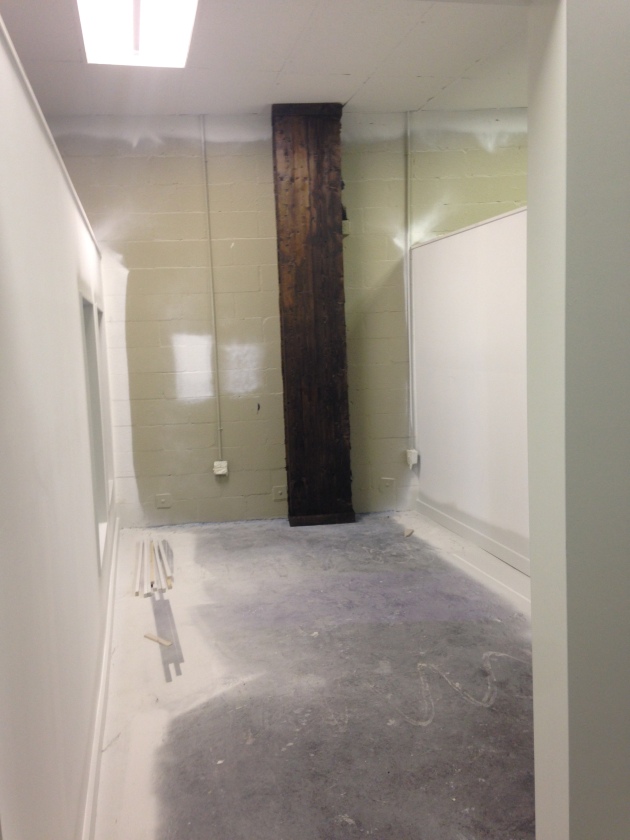
After the office build out, the lime green cinderblock columns got wrapped in wood and stained a rich walnut brown. I knew the first time I saw the space that the columns needed to be wrapped in wood to add character.
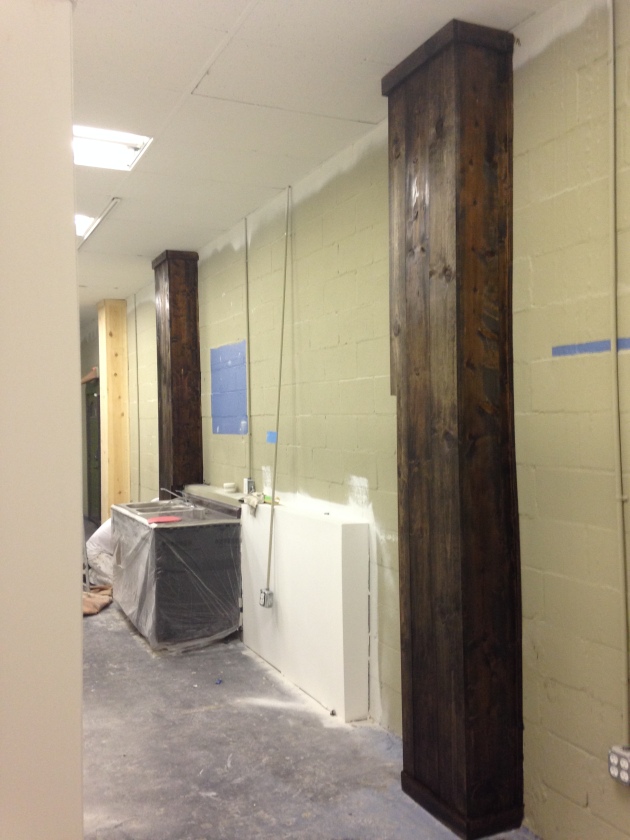
3 out of the 4 offices have a column.
This wall was saying goodbye to the dry erase boards.
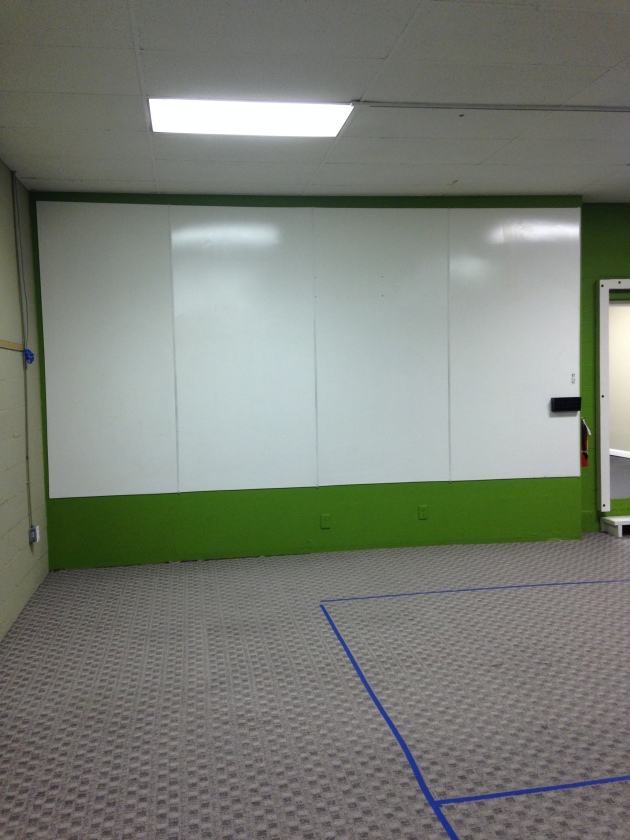
After ripping them off, we found that the drywall was in terrible shape and not salvageable.
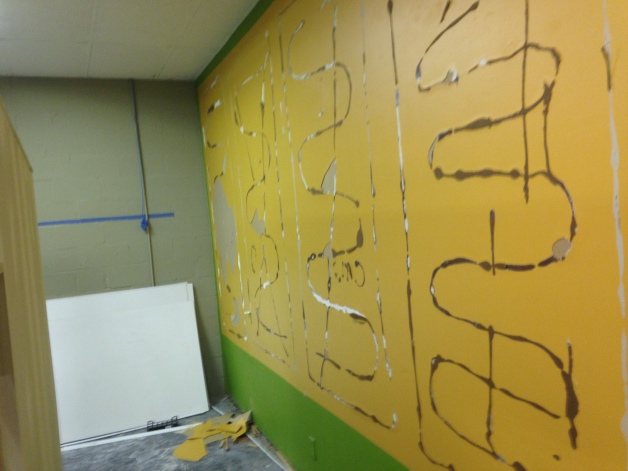
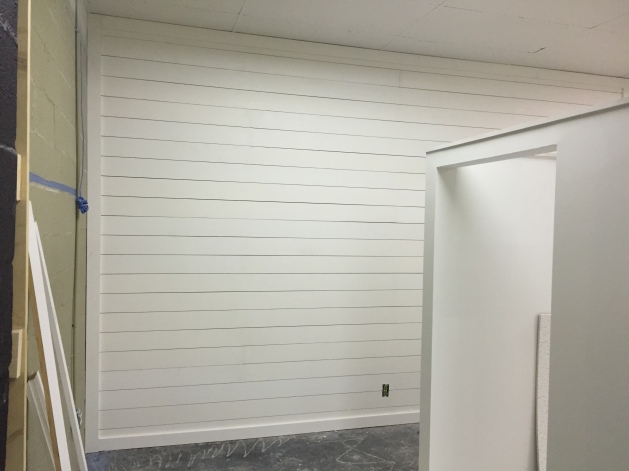
Solution=Shiplap
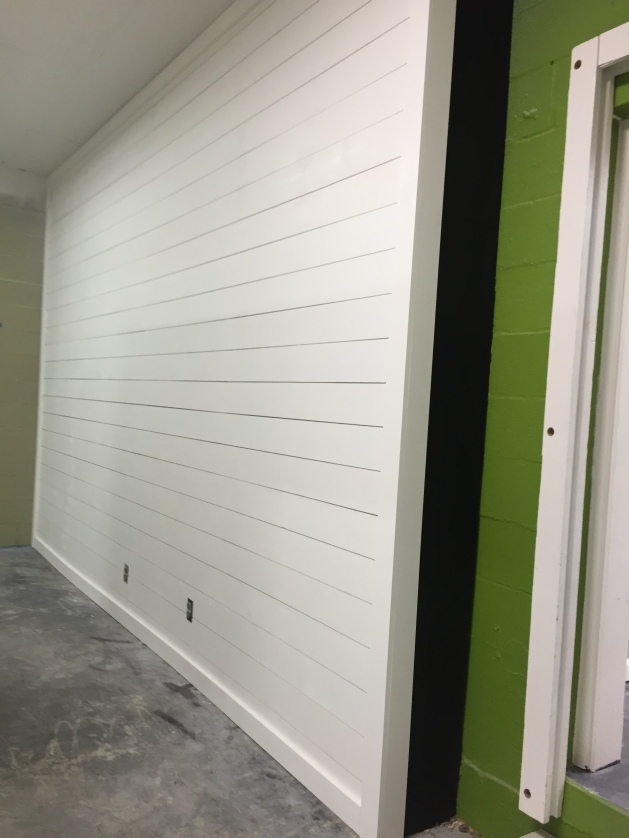
So fresh and so clean clean.
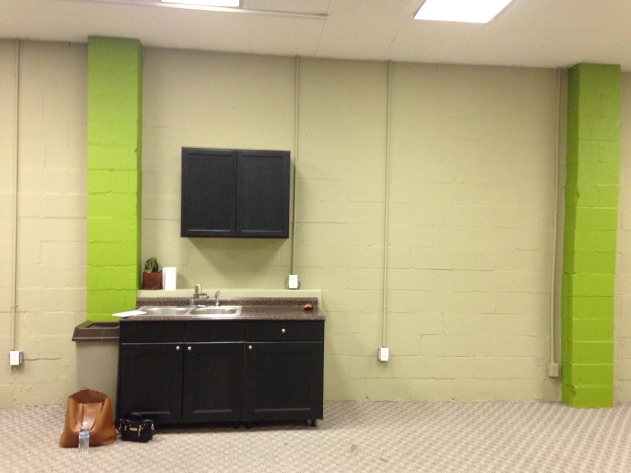
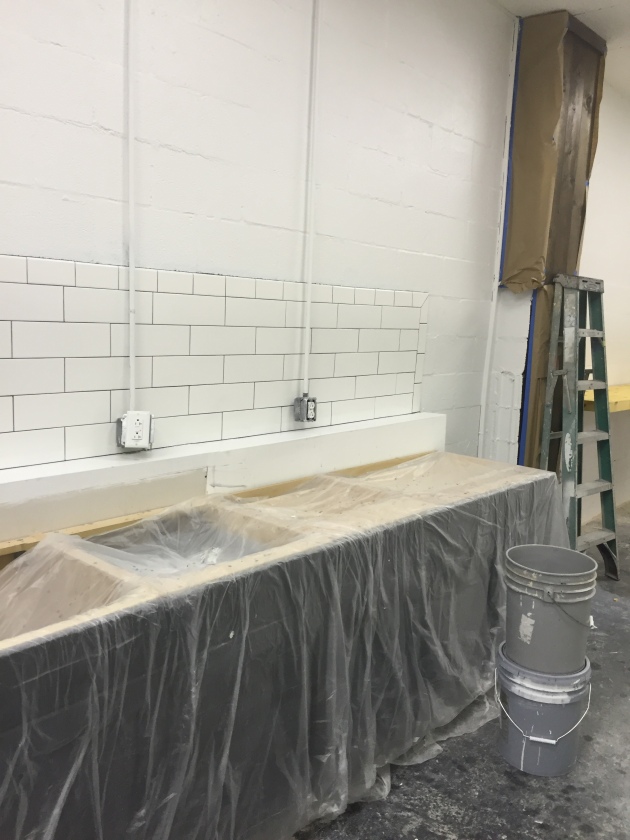
Another area to figure out was this odd “kitchen” area. They wanted to keep the kitchen so my thought was to remove the upper cabinet, add more lower cabinets and add a backsplash to make it feel more like a real kitchen.
Added lowers.
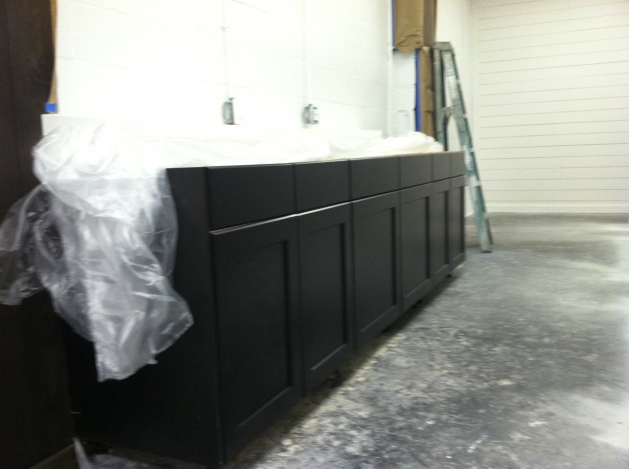
Backsplash. Now it feels like a real kitchen area as opposed to the weird situation that was happening before.
After all of that was finished, floating laptop bars and lighting were installed. Goodbye fluorescent lighting! In the photo below, the laptop bars aren’t finished yet, but this was the day that my vision was finally coming together. I used the same pendants that I used in the other office and I love the statement they make.
Oh, and here’s the finished painted concrete floors! Love how they turned out.
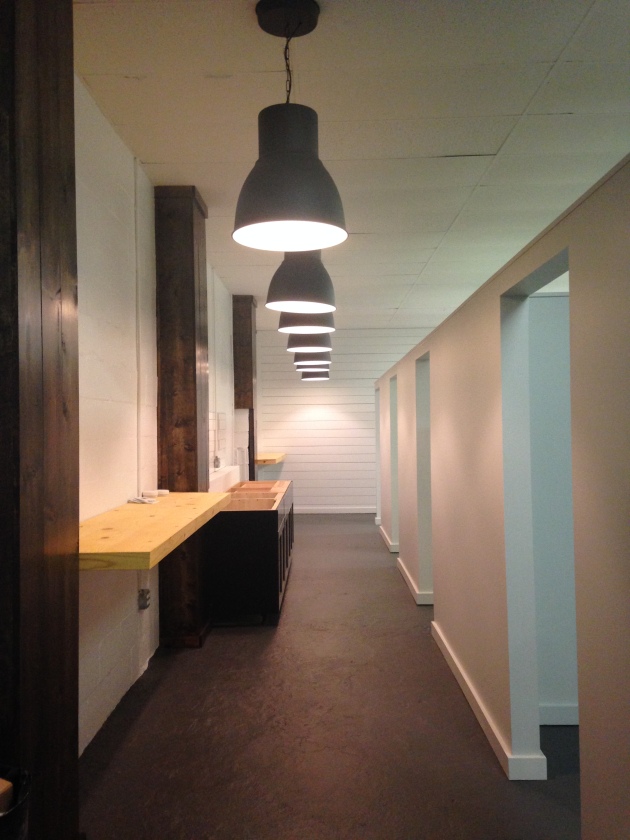

The lighting over the offices. Matte black tracks with bare bulb pendants.Love how it turned out!
A couple of other areas in the office:
Individual Office- BEFORE
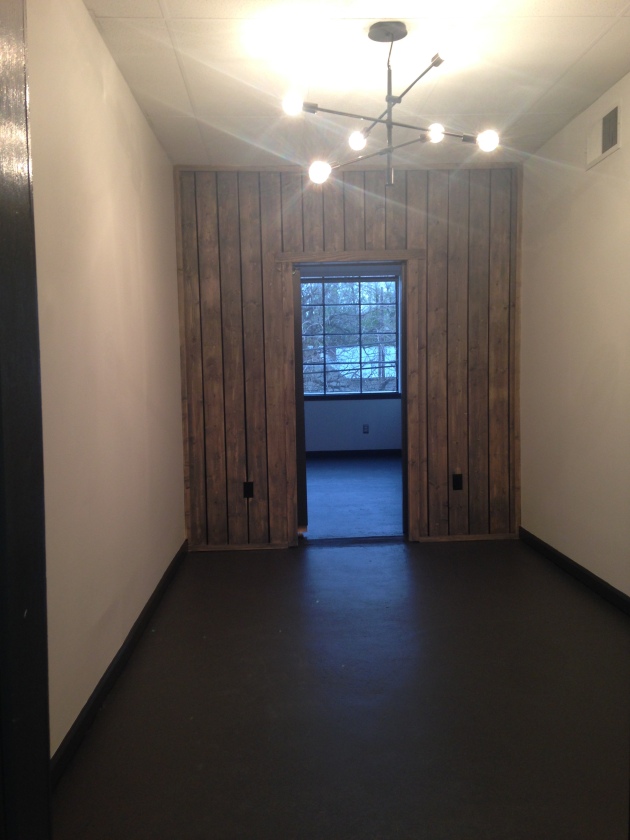
AFTER
Fresh paint, carpet and added wood elements.
Conference Room- BEFORE
AFTER
Fresh paint, new light and wood accent wall.
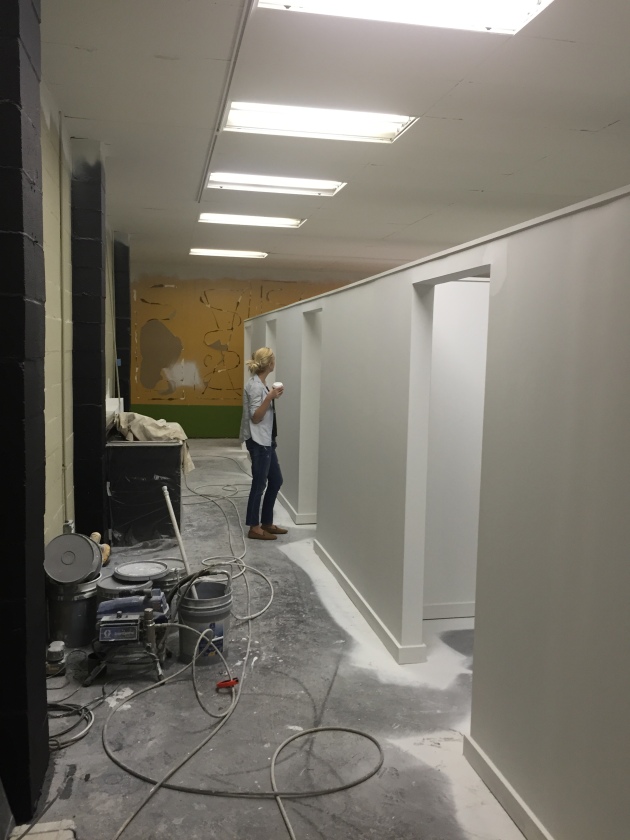
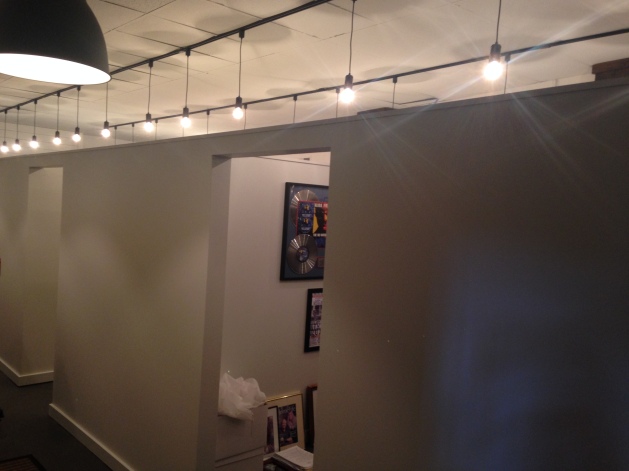
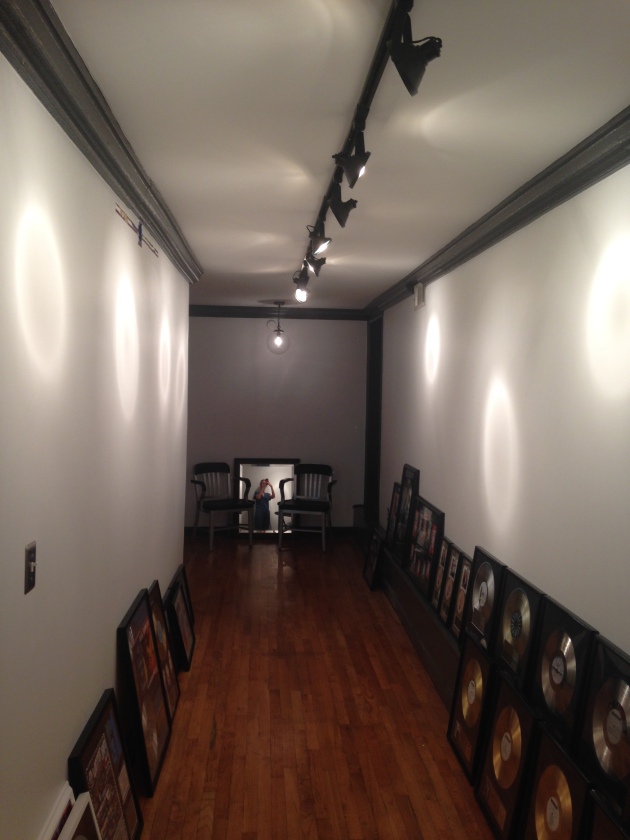
Hallway- BEFORE (well, after prep work)
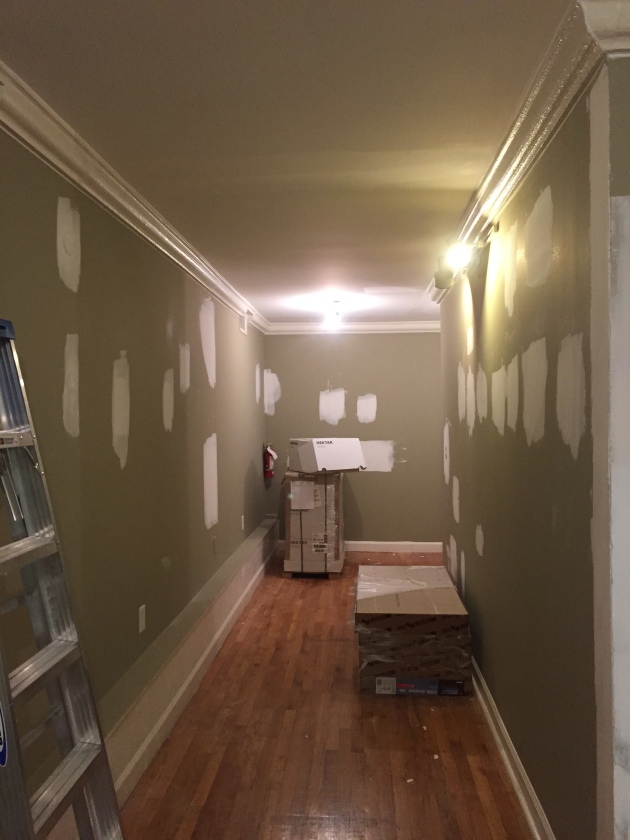
AFTER (pre art hanging, but you get the gist) Freshened up with paint and lighting!
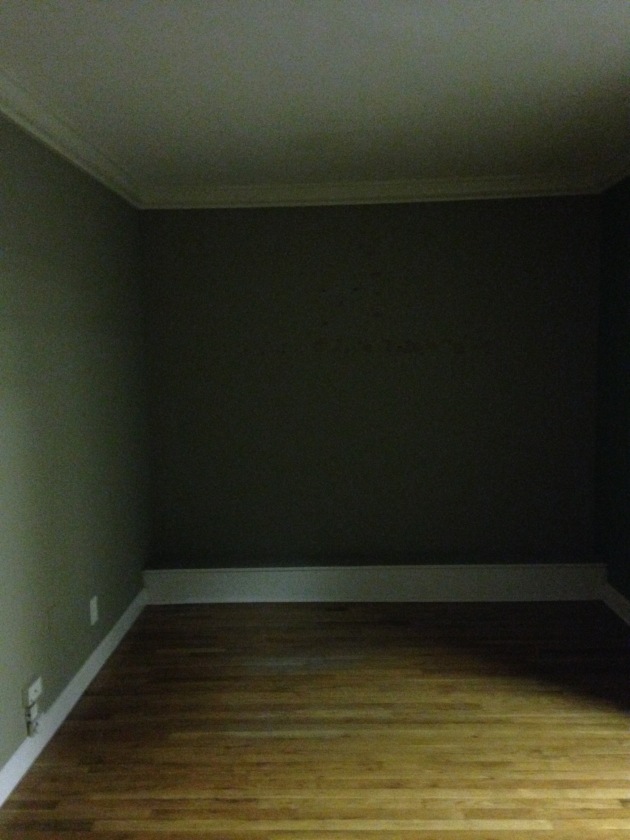
Artist Interview area- BEFORE
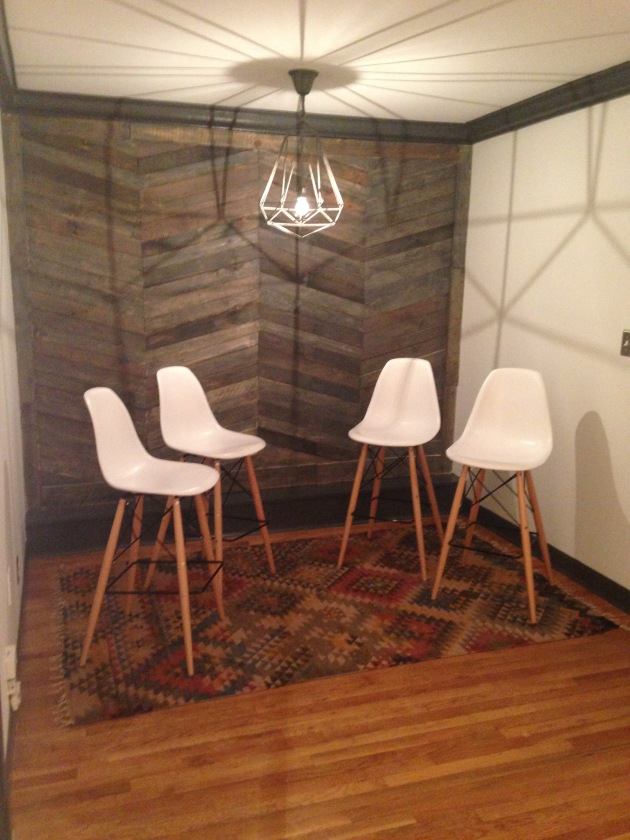
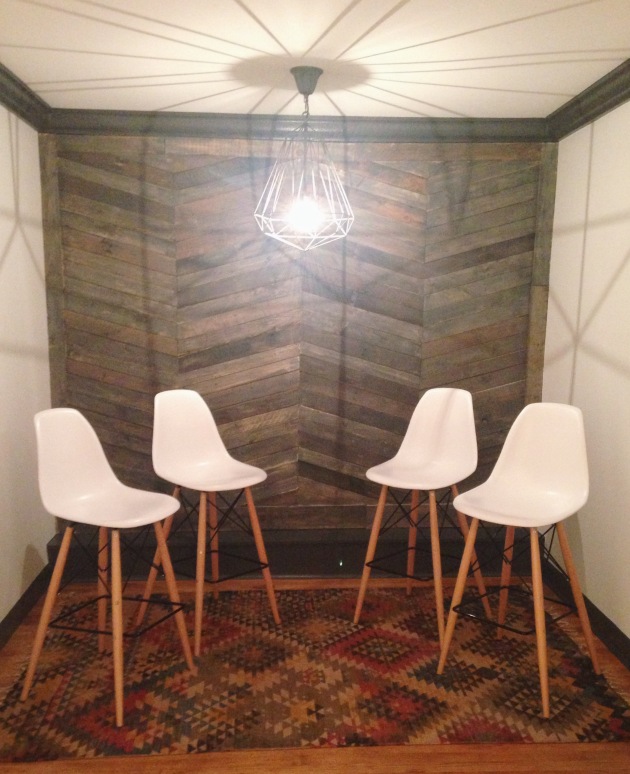
AFTER
That’s a wrap!
I am having professional photos taken of this space so I will share soon 🙂
xoxo,
O
Floors on floors on floors
Posted: January 2, 2015 Filed under: Design Inspiration, My Design, Our House | Tags: before and after, design reno, hardwood floors, Home, particle board, ply wood, subfloors, white oak hardwoods Leave a commentHey guys!
Hope you all had a Merry Christmas and a Happy New Year! Things have been moving forward with our house and the topic of discussion today is…FLOORS! As you saw in my last post, we removed the carpet and are having hardwoods installed in the living/dining/hallway. We quickly realized why everyone told us that a house is more expensive than you think…
Once the carpet was removed, we found that the sub floor was particle board. I didn’t have a clue if that was a good thing or a bad thing because I don’t know anything about subfloors, but our flooring guys quickly informed us of the problem with particle board. Back in the 70’s and 80’s when houses were being built, a lot of contractors opted for the most inexpensive products when building a house, so now, 30 years later we are finding that some of the work that was done on houses built in those years have some shoddy things going on. Basically, particle board will rot and crumble away over time so you need a solid sub floor like plywood in order for hardwoods to be installed! Our subfloor had to be ripped out and re-installed with a plywood sub floor before a single piece of hardwood could be laid! At least we know that our floors are going to be as solid as possible!
While all of the flooring mayhem was going on at our house, we were packing up our apartment! That was hard! Hard because its the place weve lived the longest. Hard because it was physically exhausting! Hard because your life and home that you made so many memories in is gone! Thankfully we are all moved out now and we can just move forward trying to make our new house feel like home!

Our dark, empty apartment. The last picture I took of it 😦

Now, for some flooring progress photos:


We had some pretty awesome curb appeal going on with scrap wood and other junk in our driveway and a toilet on our front porch! Reallll classy 🙂

New subfloor installed..yay!

This was the last picture I took before we left town for 2 weeks!!

Because I have been out of town for the entire hardwood installation process (insert scream here..ha), I have been going crazy wanting to see just a little peek of what they look like! Thankfully, our realtor went by the house and sent us a few photos! AHHH! Beautiful white oak 5″ hardwoods! Cannot wait to see those puppies finished!


I am beyond excited to get home and start putting furniture in and making this place feel like our home!
The agenda for next week:
Monday-move all furniture in and start unpacking/organizing
Tuesday-new light fixtures going in, new outlets and switches being installed and cable/internet set up
Wednesday-try to relax for a minute before we leave town again Thursday morning!!!
Next week is going to be the week when it really starts turning into our home! Cant wait to share it with you guys!!
xoxo,
O
House Progress
Posted: December 15, 2014 Filed under: Design Inspiration, My Design, Our House | Tags: before and after, design reno, Home, interior decorating, Interior design, wood beams Leave a commentWe have now officially owned our house for 2 1/2 weeks and I feel like so much has changed in the house in that short amount of time!
First order of business, which you saw in the last post, was carpet removal! What a huge difference it made when that carpet was gone! For now, we are having hardwoods installed in the living room/dining room/hallway and leaving the carpet in the bedrooms until the budget permits!
Here is a list of things we wanted to do immediately:
-remove carpet in the living/dining/hallway and replace with hardwoods
-have ceilings sanded, refinished and painted
-take down ALL light fixtures(get rid of them where they can never be found again haha) and replace with beautiful, new fixtures
-paint beams and brick fireplace
-paint all walls
-refinish both bathroom vanities
-tile bathroom floors(and scrub every surface :))
That’s our starting list! We have started to tackle each of those things the last two weeks and a lot has changed in the space!
Here are some photos of what the house is looking like at this point:

It’s amazing how much brighter and airy it feels now! Note: that pile of wood is our hardwoods acclimating to our house. If you didn’t know, real hardwoods have to acclimate to the space they are going in for several days before they are installed or else they can warp and bend. We decided to go with 5″ wide plank white oak hardwoods! Cannot wait for those puppies to be installed!!!

We hired someone to sand and refinish the ceilings and it was SO worth it! Perfect, smooth, brand new ceilings that really took it from 70’s to modern day! Note: that light fixture is hanging on by a thread…don’t worry its time is coming to an end very soon 🙂
Before:

After:

We spent Every. Single. Night. last week painting the walls!! Exhausting and tiring, but fun at the same time. Getting to see your place transform with something as simple as paint is fun to watch 🙂


Guest bedroom with new ceilings and fresh paint on the walls. That weird box light will be parting with us also 🙂

We removed the gold brass shower door, the cabinets are being refinished(just primed in this picture), the floors are getting new tile, fresh paint will be going on the walls and a new light fixture will be going in!

View standing in the hall facing the living room.

The only thing different about the kitchen is the new ceilings and the the old light fixture has been removed.

I absolutely love the brick fireplace painted white! It has a whole new life now!


So that is where we are at this point!
Still to do:
-finish painting remaining walls
-have flooring installed(which is happening this week ahhhhh 🙂 )
-remove old light fixtures(and replace with new ones soon)
Oh, here are a couple shots of the backyard because I forgot to put them in my last post. Great space, lots of potential!


More photos to come as progress is made!
Thanks for stopping by!
xoxo,
O
Office Before & After
Posted: October 14, 2014 Filed under: Design Inspiration, My Design | Tags: design reno, modern, office design ideas, office transformation, rustic, wood beams Leave a commentHey guys!
If you haven’t seen yet, I’ve launched a new website http://www.oliviacarswellinteriors.com and I’m very excited about it!
I have the After pictures of the office on my new website in the ‘Portfolio’ tab, but I thought I would share some before and afters with you guys here as well!
Get ready for a lot of pictures!! 🙂


This office was such a fun project for me! I really enjoy watching a space transform from not-so-lovely to beautiful and bright!
xoxo,
O
Clean, Simple, Contrast
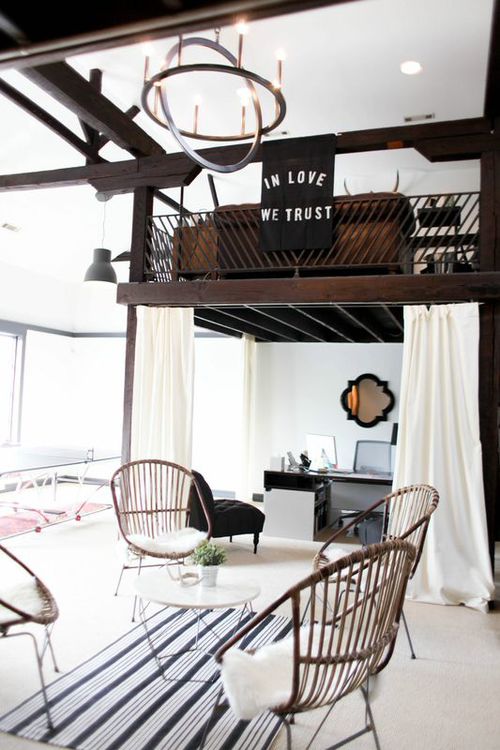
Posted: April 30, 2014 Filed under: Design Inspiration, Projects/Crafts 1 CommentHey guys! Exciting news…I am designing an office space for a music tour/band!! I am so thankful for the opportunity and I am beyond thrilled to take on this project! I will post before, in the process, and after pictures of the space as things are happening. The ball is starting to roll and I cannot wait to see my vision come to life!
For now, I want to share some inspiration photos with you.
Clean, simple, contrast describes the look I want to create in the office!


By now, you probably have a pretty good idea of what vibe I am trying to create…can’t wait to share the whole process with you!
xoxo,
O
White Ceramic Animals
Posted: April 3, 2014 Filed under: Design Inspiration | Tags: animal heads, decorating with animal heads, Interior design, white ceramic animal heads Leave a commentI’ve been traveling on a tour since November and it has finally come to an end! It was a wonderful tour…met some amazing people that are now my good friends, visited 57 different U.S. cities, and saw countless people make decisions for the Lord. The tour was incredible, but I am SO happy about the fact that I will be home for longer than 3 day intervals, the weather is FINALLY getting warmer, and some home projects are calling my name! Hopefully, I will be back to posting more regularly, but I do have several beach trips coming up where I plan to do nothing but lay on a chair for days 🙂
Anyways…today I want to talk about my love of white ceramic animal heads!! I don’t know what it is, but anytime I see a white animal head or even figurine I am immediately drawn towards it..you might be surprised that I have never actually purchased one though. Despite my love for them, I just have never bitten the bullet and bought one because they are always a little too pricey for what I want to spend.
Here’s a few inspiration photos of these white ceramic beauties!


Aren’t they just lovely? They can stand alone, be mixed in on a gallery wall with other pieces, be grouped with other white ceramic creatures…they just look great however you choose to use them. I am excited because I finally bit the bullet and bought an animal head of my own! Yayyy!
Stay tuned to see which white ceramic creature is now gracing us with their presence in our living room! 🙂
xoxo,
O
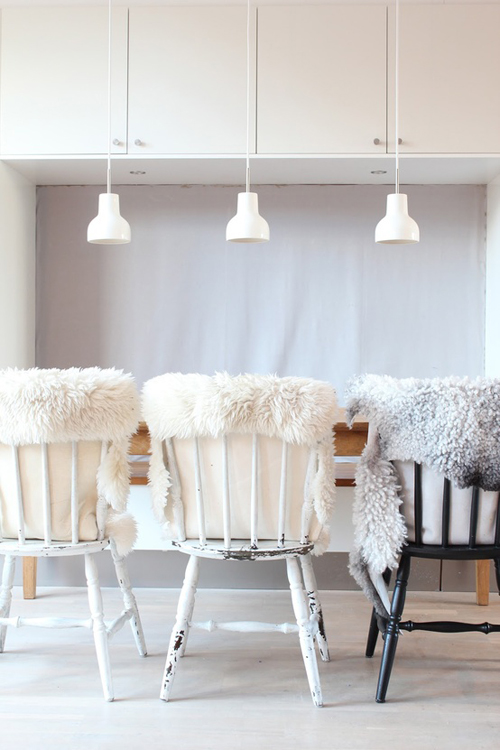
Sheepskin
Posted: February 22, 2014 Filed under: Design Inspiration | Tags: sheepskin rugs 1 CommentToday, I want to talk about one of my absolute favorite things to decorate with…sheepskin! It’s soft, luxurious, pretty, and can be used in so many different ways. I think a room with sheepskin instantly has a more luxurious feel and it doesn’t have to be real sheepskin. Ikea sells faux sheepskin rugs and real sheepskin rugs for only $10 and $30.
Here are some photos of rooms using sheepskin in a variety of ways:


Here are two places in my home where I’ve used sheepskin. My bedroom!

And living room:

I don’t know about you, but I love sheepskin…you just can’t go wrong with it 🙂
Thanks for stopping by!
xoxo,
O
Gallery Walls
Posted: January 30, 2014 Filed under: Design Inspiration Leave a commentToday, I want to share some inspiring home decor photos of gallery walls. I love a good gallery wall! It’s a place in your home that makes a statement whether it’s a gallery of your favorite art, photos of your family, mirrors, other random objects, whatever it is…it will definitely draw attention!


I dont know about you, but those photos definitely inspire me to find a blank wall in my apartment and start creating a gallery wall of my own 🙂
xoxo,
O
